Pinewood Derby Car Build Fun
It is that time of year again in Scouts and other groups…time to build your Pinewood Derby cars. The goal is to transform this…
into a masterpiece of art and speed!
Each year I make three cars (one each for my son and daughter and one for me). Finding the right balance in the time we spend on the design and paint versus the time we spend on making them go fast has always been tough. This year I caught a break! For the first time I can use the CarveWright machine to carve full depth on the 1.5″ tall pine block thanks to the newly released long carving bits.
Also for the first time ever the theme was obvious. My son initially wanted a Minion car but once our beloved Seahawks won the Superbowl we all knew what the cars would be…The Legion of Zoom!
The overall design of the car was inspired by the shape of the Seahawks logo.
So how can we use the CarveWright Designer software to construct a car with an accommodating shape? Good question….here is a summary on how I did it.
The only software that I used in the design was the CarveWright Designer 2.0. Version 2.0 is needed because the deep carving functionality is required. The Pinewood Derby block measures 1.75″ wide x 7″ long x 1.5″ tall. Obviously, the wood block is too small to load directly into the machine. I planned to construct a sled/jig to hold the block and then jog the bit to the center of the project. It is always important to think about how you will hold a workpiece as you design your project.
In this case I started by constructing the sled to hold the wood block. I planned to carve the entire car from the top side so I knew the sled did not have to accommodate a flipping of the car to carve two sides. I started with a piece of high density MDF as the base. I usually choose MDF for sleds because it is flat and dimensionally consistent. The overall sled length needs to be at least 7 inches longer than the wood block in order to always keep the compression rollers on the sled. I made this sled 16″ x 9″.
I add rails along the length of the sled to provide a surface for the machine’s compression rollers to roll on. The height of the rails is the same as my wood block thickness. I space the lengthwise rails out from the wood block with removable spacers because I don’t want to cut into my sled. I then add two blocks in front and behind the wood block. These blocks not only set the position of the wood block relative to the end of the sled but also serve as a visual reference for the board locating sensor as it is finding the edges of the jig on startup.
I then add two countersunk screw holes along the centerline of the wood block on the bottom side of the sled to secure the wood block for carving. Make sure that the position and length of the screws do not impinge on the carved area for your design (no carving hardened steel screws). There are other ways of securing the block but this method works best in this case. The last step in building my sled is to add masking tape along both bottom edges. This will help ensure a positive engagement with the board tracking sensor which is located on the edge closest to the keypad.
Since I will be manually jogging the bit to the position of the wood block on the sled, I do not need to maintain any particular precision in the sled dimensions. The only critical issue is that the wood block is positioned parallel to the side of the sled.
We are ready to carve! But first…what kinda car are we going to make?
As noted above I knew the theme would be Seahawks. I also noted that the shape of the Seahawks logo was roughly the same length to height ratio as our wood block. So my plan was to create a 3D hawk head shape in the software so that I could apply the logo in paint to it.
In the software, I started with a project board 3″ wide x 11″ long x 1.5″ tall. Since the sled is much bigger than these dimensions it will ask me where to place the project on the sled which is what I want.
Next, I lay down a rectangle that is the size of the wood block. This allows me to see the boundaries of the block. One small tip is to turn off the perspective view. It takes the perspective distortion out of the view which is critical when you are trying to line up the deep carving.
I am going to use the sweep with rails to get a shape that narrows toward the front of the car. I sketched a Bezier curve on the surface of the board that will serve as the first rail (and the shape of the design as seen from the top). I made sure that the curve does not extend outside of the rectangle dictated by the size of the block. The point on the nose of the car is positioned on the project centerline.
Once I had the curve as I desired it (I can always come back and tweak it later), I mirrored the curve across the centerline.
Now I have the two rails needed for the sweep. I selected both curves and hit the Sweep with Rail icon. It send me to a split screen where I see the project board in cross-section. The left and tight extents of the rail are shown by red and green lines. For my design I want a sharp spine down the centerline of the car so my cross-section shape needs to have a sharp point in the center. I sketch a Bezier curve on one side of the centerline and then mirror it to the other side. The endpoints are attached to the red and green lines. I selected the Scale Z check box so that the height of the cross-section is proportional to the width between the rails (skinnier means shorter).
So we now have the basic car shape.
I want to clear some space around the car so I lay down a rectangle and make a region the full 1.5″ deep.
Next I need to make the arched bosses that will accommodate the axles. My block already has pre-drilled axle holes so I have to make sure I position the bosses in exactly the right place relative to the front of the car. This time I am going to use a straight extrude. I place a rectangle down to give the location of the boss (and attach it to the front of the car precisely). Make sure the box extends across the region you made in the previous step. I then selected the extrude button.
The split screen view appears and I sketch the desired cross-section. The ends of the arches are positioned on the red and green lines which signify the edges of the rectangle I drew in the previous step. In my case I sketched a semicircular profile. Hit Ok to proceed.
You can see that now we have a wheel boss in the front of the car that matches the pre-drilled holes. This geometry can be moved or modified at any time as the design progresses.
Since my car is centered on my project board, and since the wheel holes are the same distance from the front and back ends of the car, I can simply select the front wheel boss rectangle and mirror it horizontally.
The car is now ready to take to the machine and cut. One think to note: Since I removed the spacers after screwing the block to the sled I need to put a piece of masking tape across the sled so that the board sensor does not think the sled is only as wide as the rail. When you load the sled into the machine make sure that the bottom of the Y-truck is directly over the tape.
After about one hour of normal-quality cutting time, the car rises out of the sawdust.
Then detached from the sled…
Several layers of primer and sanding later, I painted the car with a gloss white.
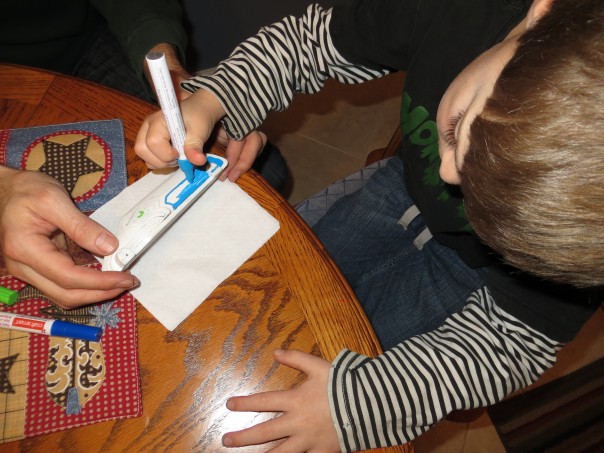
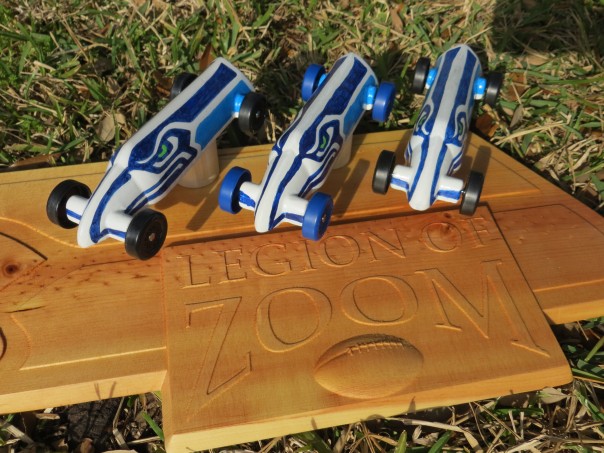
Or resident artist Joe then hand sketched the Seahawks logo onto the car. Using acrylic paint pens found at Hobby Lobby we went to town on the coloring.
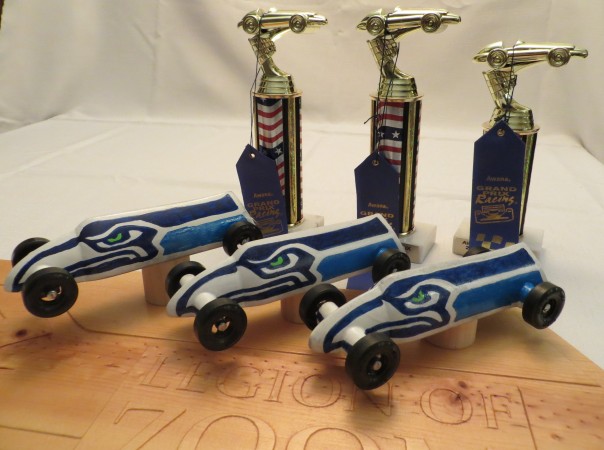
It really didn’t take that long once the pattern was transferred. The paint pens were a joy to work with, especially with the kids. The resultant car came out better than I had hoped.
The kids did almost as good of a job of painting as the “professionals”.
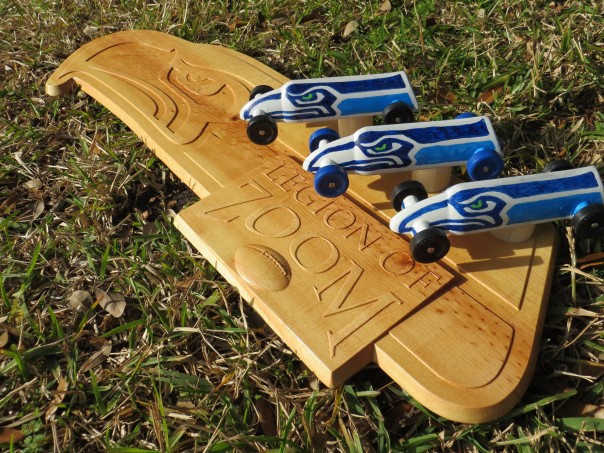
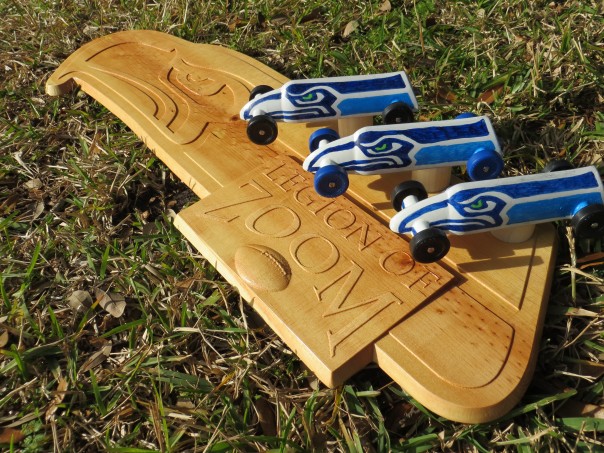
The last, but very important step was to polish the axles, assemble the wheels and tweak the performance (several secret touches to make the cars go fast). Since the design and painting came out so superb I decided to make a quick stand for them. I used the Seahawks logo again, this time importing it into the software. I laid it on a 36″ long piece of salvaged 1×12 pine. I added a region for the nameplate, tilted it up to the middle of the board, added some warped text using the Edit Envelope tool and threw on a football pattern. I outlined the logo pattern and created an offset path. I then used that path to make a region that pierced all the way through the material. I added tabs into the design to hold the pattern in place.
I used a salvaged piece of 1″x12″ pine from my bathroom remodel for the sign. Notice the tabs for securing the piece as it carves.
I sanded the sign and shot it with a few coats of polyurethane. The finish brought out the beautiful grain and glow of the pine.
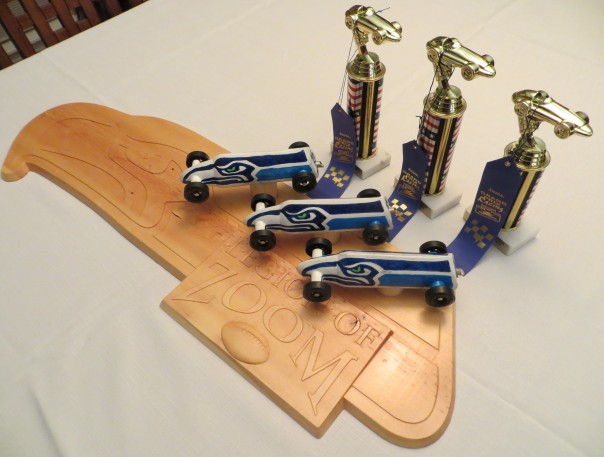
The sign is a perfect stand for the cars and compliments them beautifully.
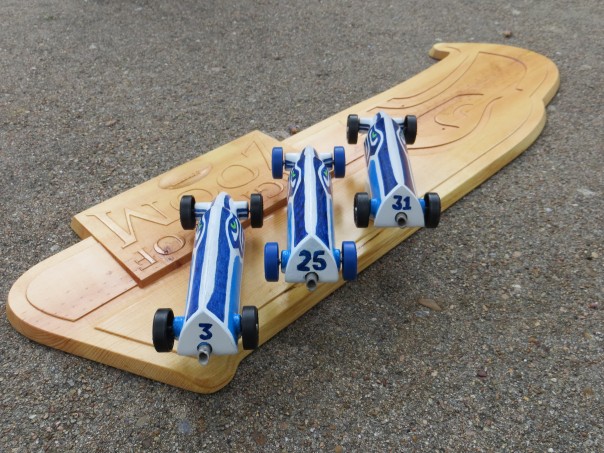
And that is how the Legion of Zoom was created. Stay tuned for the race results!
The results are in…and the Legions of Zoom was fast…
…two firsts and one second in their respective divisions. And in case you are curious…we ran them against each other and the Richard Sherman car was fastest, followed closely by the Russell Wilson car and then the Kam Chancellor car. Interesting how it worked out. Hawks are winners again!
Explore Project Categories
Customer Stories
News
Subscribe To Our Newsletters
Learning, projects, customer highlights, and promotions in your inbox!


