Chess Table Part 2 – Vcarve a Chessboard
This is part 2 of the Chess Table project. Check out part 1 here, if you haven’t yet. In part one, I covered the design and carving of the chess pieces and the idea stages of the table design. Now, I have the lumber (some really choice curly cherry and flame maple for the chess board), and my project plans tell me every cut I’ll need to make. None of the carvings, however, are designed yet (other than a vague idea of what they’ll look like in my head). It’s time to sit in front of the computer to layout my pieces.

The Chessboard
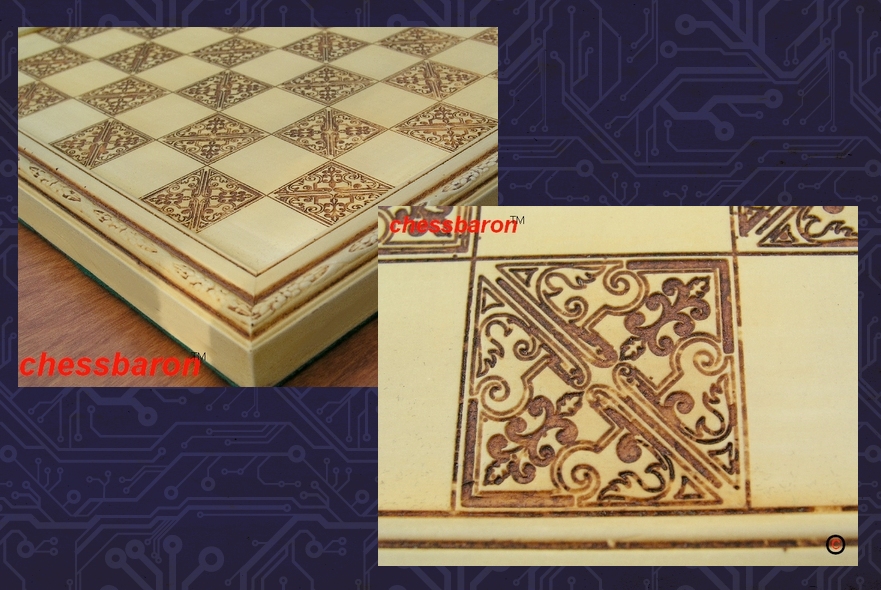
The entire design of the table was dictated by the chess pieces themselves. They each have a 2 inch diameter base, which required the size of the chessboard squares to be slightly larger than 2 inches. I determined 2.5 inch squares looked the most pleasing, which resulted and 20 inch chessboard. A feature in Designer PRO 3 is the “Make Vector Group” tool. This allows for closed vectors to be v-carved like our Centerline Text add-on feature. I had found a chess board carved in ivory during my research that I really liked. It had a hand chip carved look that could be recreated beautifully with this new CarveWright feature.

I worked in Adobe Illustrator to draw my design. I work in this program, because I am familiar with it, but there are many programs that can do the same kind of drawing. CorelDraw is another popular vector drawing package, but if you are new to this, there is a free program called Inkscape that does the same type of drawing. All of these programs have two things in common, they draw with vectors and export as DXF.

Another thing that is extremely useful with this new type of vector group carving is the abundance of free content online. Just Google “free vectors” and you’ll see what I mean. All of this content can be converted to DXF and imported into the CarveWright System. So, using these resources I put together a design for my chess board.

Now, I can’t carve a board this large by itself with my CarveWright, nor am I going to find a board this size without having to glue boards together, so I had to split it in half and make 2 DXF files.

Importing these into Designer was pretty straight forward with the DXF importer add-on feature. They were designed at the size I wanted them already, so in the DXF importer, I simply created a board and saved it into designer. To see more about this process, check out the DXF importer tutorial videos here.

Once in Designer, I needed to separate the lines from the closed vector shapes by placing them in their own group. What I mean by “closed vector”, is a shape defined by an unbroken outline. The lines marking the grid on the board are just lines and don’t have a shape, so they won’t work with the vector group feature.

With just the closed shapes selected, choose the “Make Vector Group” button.
The make vector group tool can be used with either the 90 or 60 degree v-bits. In this case, the depth of the 60 degree v-bit is preferred, since some of the areas get pretty thin. Next, select the areas you want v-carved. You have the option of choosing specific sections, all of them, or every other one.

Next, I selected the lines I had grouped separately and chose the select bit tool.
I used the 60 degree v-bit in the vector group, so I’ll choose it again here, and and set a shallow depth of 1/16″ (.o62) to match the thickness of the v-carving.

Now, the first half of the chessboard is ready to carve. I repeated this process on the second half and loaded them both onto the memory card.

Then comes the fun part. I had picked out some 1×6 flamed maple to make the chessboard out of. First, I cut and glued up my boards.

Then, this project was going to need a jig, mostly just to minimize waste. That maple is expensive!
The jig is very simple. Take some scrap wood, at least a 1×4, and cut it into 2 pieces to go on either end of your project board. Then, cut a piece of MDF or plywood to fit under all of this. Secure it all down with screws and you’re ready to go. Now, when you carve this you can tell the machine to center the design and it will carve only your project board in the middle. Here is a PDF that explains more about carving jigs.

After your board is prepared and in the jig, its time to let the CarveWright take over.

Run both halves of the the chessboard, and put them together to see how great it’s going to look.

These still need to be ripped on a table saw to the center of the centerlines and then glued together. This is, actually, the most challenging part of the entire project. This chessboard has to be perfectly square in order for the rest of the table top to fit together properly. Plus, you have all these lines to match up, when you glue it together!

Taking your time and getting it right is totally worth it.

There is more work to do on the chessboard before it’s finished, but there are several more pieces we need to make first. Part three will cover carving and building the legs.
Explore Project Categories
Customer Stories
News
Subscribe To Our Newsletters
Learning, projects, customer highlights, and promotions in your inbox!


