Skip to content
This project utilized almost every feature of CarveWright’s CNC systems and is a great demonstration of it’s power to create anything. Below I’ll outline the processes we went through to design and build this project.
Planning the Table
This project started as a desire to make chess pieces with the rotary jig, but then why not make a chess board to go with it. Several ideas were bounced around and I almost settled on designing a tabletop board carved to look like a castle with drawers for the pieces. That would be a wonderful project, but I realized it would be as large as a table. So, why not just make a whole table?
One night I was contemplating this project and I sat down to watch Game of Thrones. I love the intro to that show, as I think most fans do. I was noticing the carved heraldic bands revolving around the sun thinking “those would be fun to carve”.
I was able to find the panels online and was disappointed to find there are only three. A three sided chess table might be hard to pull off. Oh well, I’ll figure that part out later.

So I’ve decided to make a table, and I have a theme. Now, off to Google to do some research on what chess tables look like. There are chess tables in every possible style you can think of. Being that our theme involves traditional heraldic elements, keeping with a classic style is most appropriate. That helps narrow it down a bit.
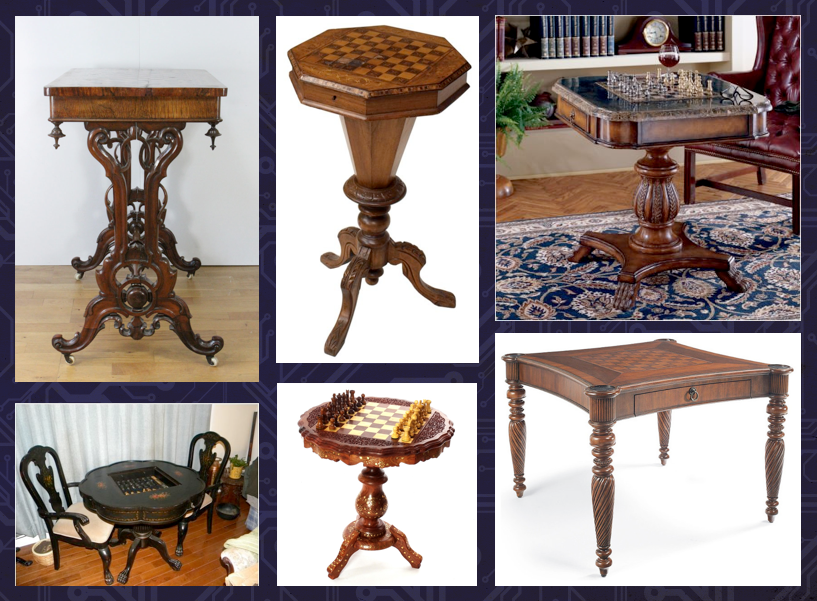
When looking at these table designs, I try to imagine how I would machine them. I settled on what seemed to be a common style of legs, that is quite elegant and perfectly suited for being made on a CarveWright CNC.

I also came across several chess boards that had carved squares rather than the expected alternating wood blocks. This looked like a perfect job for vcarve.

Now with all these ideas, its time to draw up some plans. It is critical to work from some sort of plans when building anything. Even if it’s just rough sketches with your measurements written in. Just make sure your measurements are accurate. Sometimes, there are already woodworking plans for what you want to make. Keep that in mind when doing your searches.
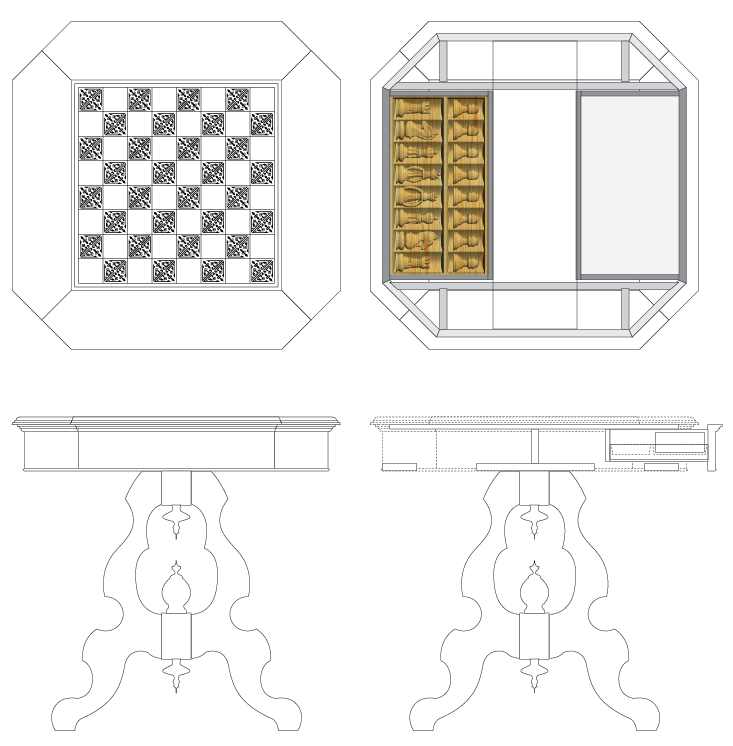
From the plans, I could determine how much material I needed and went shopping for lumber.
The Chess Pieces
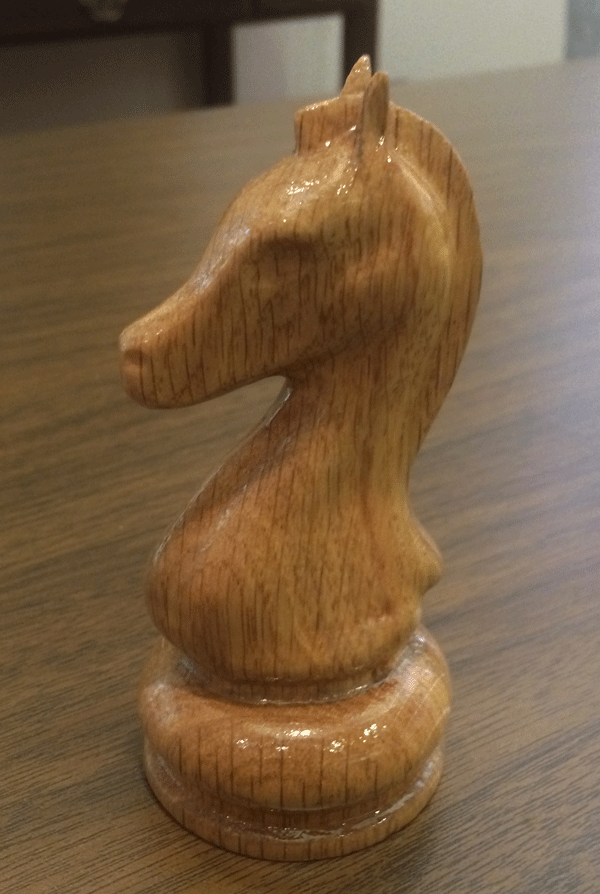
Chess pieces are an obvious choice for the rotary jig. As soon as I have a rotary jig I wanted to make a chess set and set out to find some existing models online. After some searching I found a set I liked on thingiverse.com.
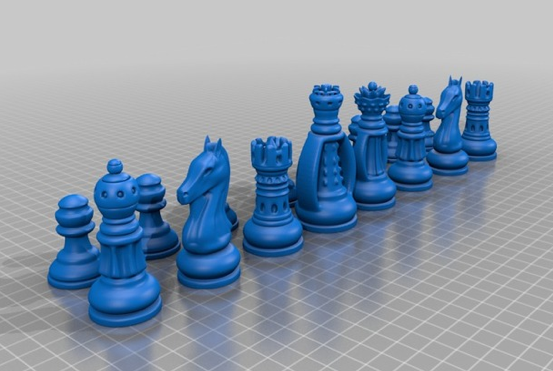
These were more interesting then the normal plain turned pieces you see. I didn’t want to use the jig to make something that would look like it came off of a lathe. It needed to be carved. I downloaded the files and imported them into Designer.

After several days of carving, I had a complete chess set carved in oak.
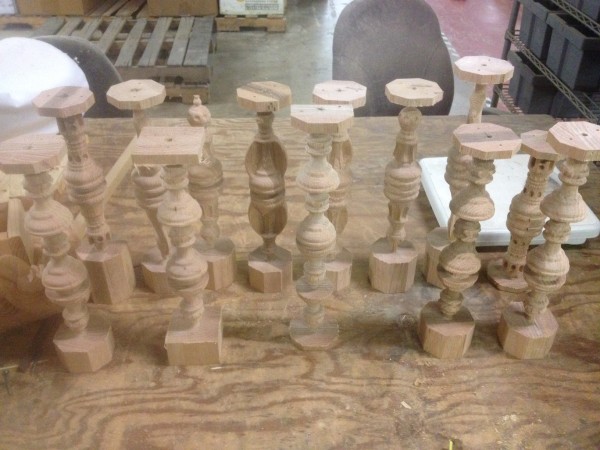
I was able to chuck the pieces into a lathe to help sand the smooth parts, but most of it was carved and irregular, which needed a 240 grit sanding mop. Once sanded, I removed the individual pieces with a band saw.
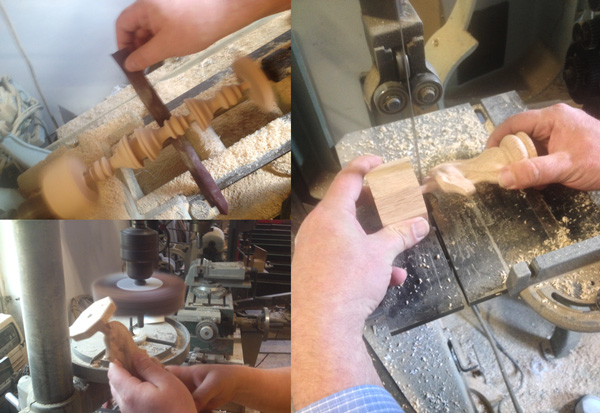
Once separated, I worked with them individually. They all went through various levels of hand sanding, filling, and shaping with a dremel, until I was ready for finishing. The dark pieces were stained with a Minwax red mahogany penetrating stain and the light pieces were just clear coated with high gloss polyurethane.