
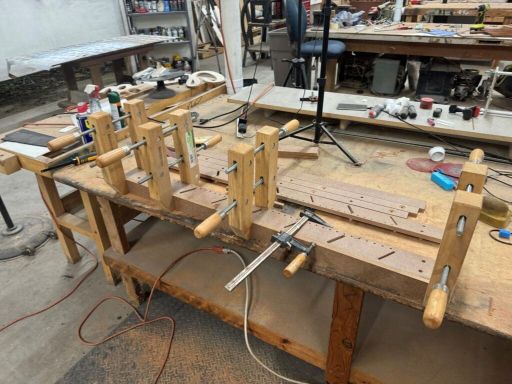
The RAVEN streamlines many aspects of CNC operation, yet you’ll still need to spend time installing tracking belts and figuring out how to secure materials. Here’s a universal jig inspired by the CarveWright Universal Carrier Base, but tailored for use with the RAVEN. This jig simplifies holding workpieces securely by using compression rollers, eliminating the need for additional waste material or concerns about snipe. It can accommodate boards up to 36 inches in length, 14.5 inches in width, and with a thickness ranging from 0.5 to 1.5 inches.
Check out these improvements to the jig!
Supplies
Here is a list of the items needed. With the exception of the adjustable leveling feet, the hardware can be found at most hardware stores. For convenience, I have included amazon links to all the hardware except for the all-thread.
- 48” x 15” x .5” thick MDF or plywood
- 1/8” Cutting Bit
- (8) 1/4″-20 x 1 Threaded Knurled Thumb Nuts
- (8) 1/4” T nuts
- (8) 1/4” washers
- (4) 3/8” All-thread 16.75” long (Shorter lengths can be used. The max capacity of the jig is 1.75“ shorter than the rod used)
- (4) 3/8” wing nuts
- (7) 3/8” nuts
- (8) 3/8” washers
- (5) 3/8” lock washers
- (2) 10-32 x 1.5 inch screws
- (2) 10-32 x 1.25 inch screws
- (4) 10-32 nuts (comes with the screws)
- (2) 10-32 wing nuts
- (2) Adjustable leveling feet

Compiling
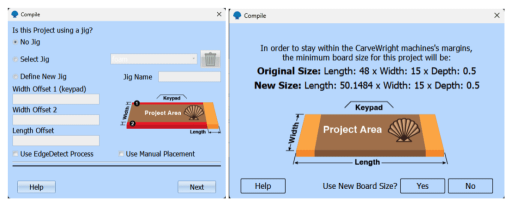
When compiling the project select No Jig. On the next screen select No to “Use New Board Size”.
Note: This project is a little more than 1” shy of staying under the compression rollers as designed. This is due to wanting a 3’ jig and cutting it out of readily available 4’ material. When not keeping under rollers care needs to be taken to make sure you have outfeed rollers set to keep the board level both in and out of the machine to prevent cantilever. As always make sure the tracking tape is well secured.
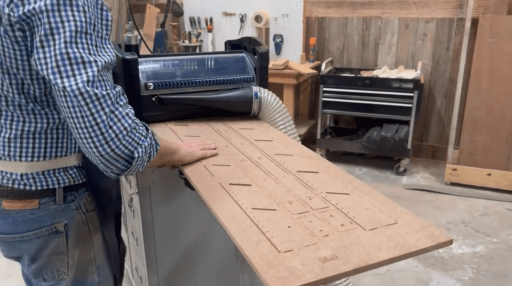
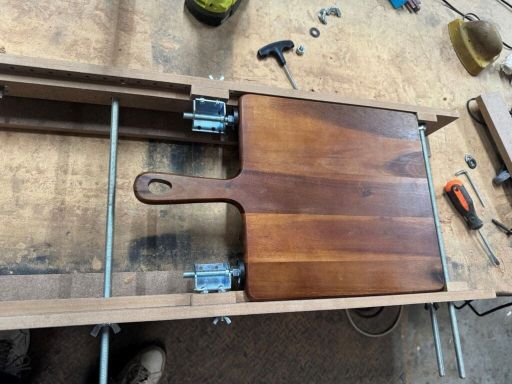
Carving
Apply the accutrack belt to the bottom of your board and place it in the RAVEN machine. Simply select the project from the menu, set the head pressure, and install the 1/8” bit it requests. The RAVEN then proceeds to cut the project. I should take approximately 1.5 hrs.
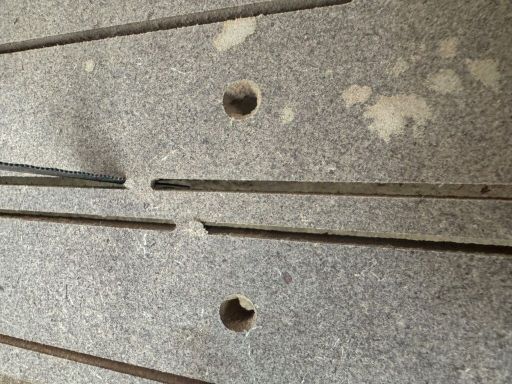
Assemble
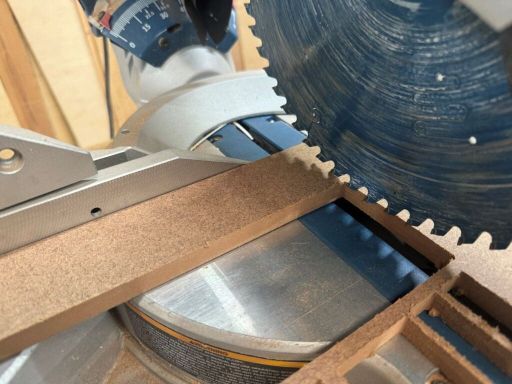
Once the project is done carefully cut the tabs and sand them down.
Next cut the two Bottom Plates from the remainder of the board.
The Bottom Plates are glued to the Jig sides. Make sure the two Jigs sides are smooth and they are the same height. When gluing make sure the Bottom plates and Jig sides are lined up and square.
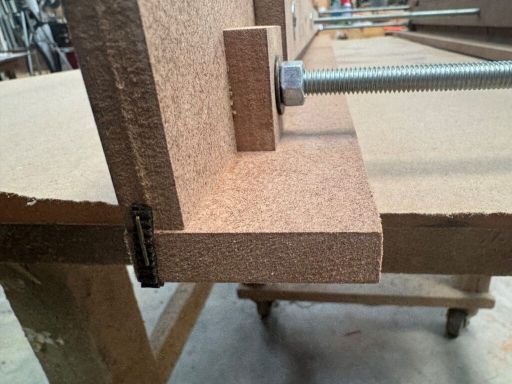
Next insert the two all thread pieces into the head of the JIg and glue the head blocks to the side jig. On the keypad side of the jig use a 3/8″ nut and a washer on both sides of the jig side to secure the all thread. These nuts should be tightened securely.
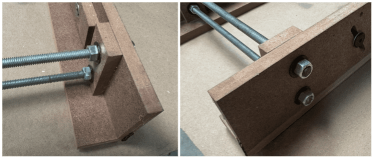
Do the same with the back block and all-thread.
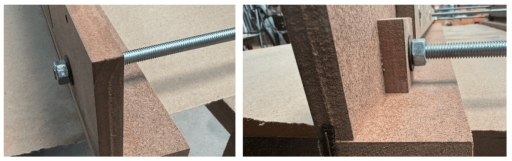
On the adjustable side of the jig place a nut and a washer on the inside of two lower all threads. On the outside place a washer, a lock washer and a wing nut on all threads.
Press the 8 tee nuts into the support rails and attach the support rails using the furniture bolts(this has been changed to 1/4″-20 x 1 Threaded Knurled Thumb Nuts). Be sure to use washers with the bolts to keep from damaging the slots.
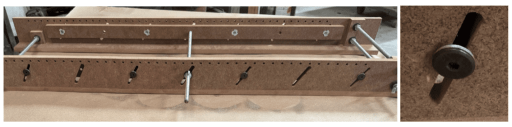
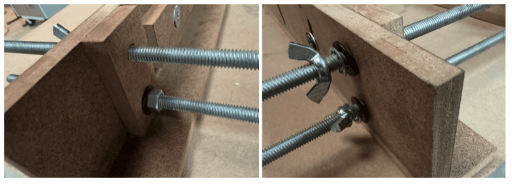
The center all thread is run through the support rails and uses a nut and washer on the keypad side and a washer, lock washer and wing nut on the adjustable side.
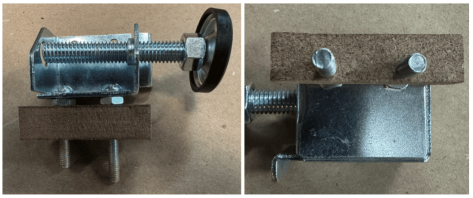
The clamps are assembled with two 10-32 screws one 1.5 inch long and one 1.25 inch long. Place a nut on each screw and thread into the spacers as shown. The spacer needs to be installed with the holes to the bottom as shown.
Last step in assembling the jig is to attach the Accutrack belt to the jig. As alway to use pressure to activate the adhesive and because this is a permanent attachment staple the ends to ensure the belt will not get snagged when installing the jig.
Using the Jig
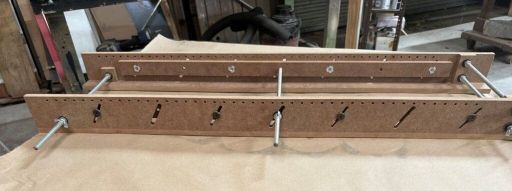
The two lower all threads are for setting the width of the jig. These must be set and secured so that the sides of the jig are parallel. This is important to keep the jig from shifting sideways and or wedging in the machine. The top and middle all threads are for clamping the workpiece side to side. The “clamps” are attached using wing nuts and are to clamp the workpiece against the head blocks. The support rails are set so that the top of the workpiece is flush to the top of the jig sides.
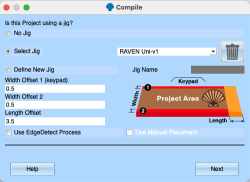
When using the jig for a project, define the jig’s offsets on the jig screen and name it so you can quickly select it again. Width Offset 1 = .5″, Width Offset 2 = .5″, Length Offset = 3.5″
Note: this is an open project. I am certain there are many improvements to be had. Please feel free to experiment and share any improvements you come up with. We will periodically update this project as improvements become available.