Restoring Antique Leather Embossed Chairs
There was this set of six antique gothic chairs from the late 1700’s that we found in the far back of an antique store, almost as if they were embarrassed of them. They were worm eaten and the leather seats were rotting away, but, if restored, they would be perfect for the Lovchik library. Restoring the woodwork is fairly straight forward, but how does one reproduce that embossed dragon design in those leather seats? We had a pretty good idea how to do it with our CarveWright System, so we bought the set.

Designing the Dragon
To start, we need to recreate the dragon design. We removed the leather from the chairs and laid the best piece out flat to take a photo. Then we used the “Import Tracing Image” function from the Vector Drawing Suite to bring that photo into our CarveWright Project Designer workspace. From there, we traced the individual parts and gave them dimension with tools from the Pattern Modeling Suite.


Once the modeling was completed, the finishing touches were added and blended in Pattern Sculptor.

A few years ago, we did some embossing for the Dr. Beard’s apothecary trunk project by carving a positive and negative of the design in a solid surface acrylic (corian) material. The plan is to do the same with both sides carved into 1/4″ corian.

Carving The Dragon
Being only 1/4″ thick, the project needed a jig. We used the same technique for making a jig as we do for lithophanes. See the Make a Lithophane Jig tutorial for details on carving a jig to your specs.

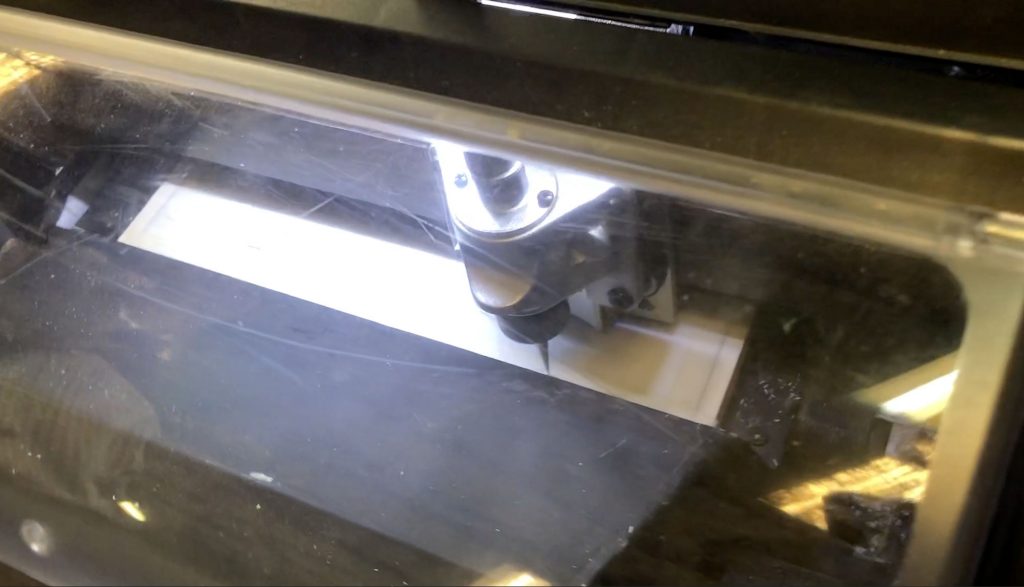
With the material and jig prepared, the projects are uploaded and carved one at a time.


Embossing the Dragon
The positive was carved all the way out of the corian material and required it be secured to a backer. This was done by spreading epoxy evenly over the backer surface and affixing the carving.

We experimented with a few kinds of leather, but found the regular vegetable tanned hides from Tandy Leather worked best. The old leather coverings were used as a template and we trace the rough pattern onto the new leather, leaving about a 2 in margin on all sides for shrinking and stretching.

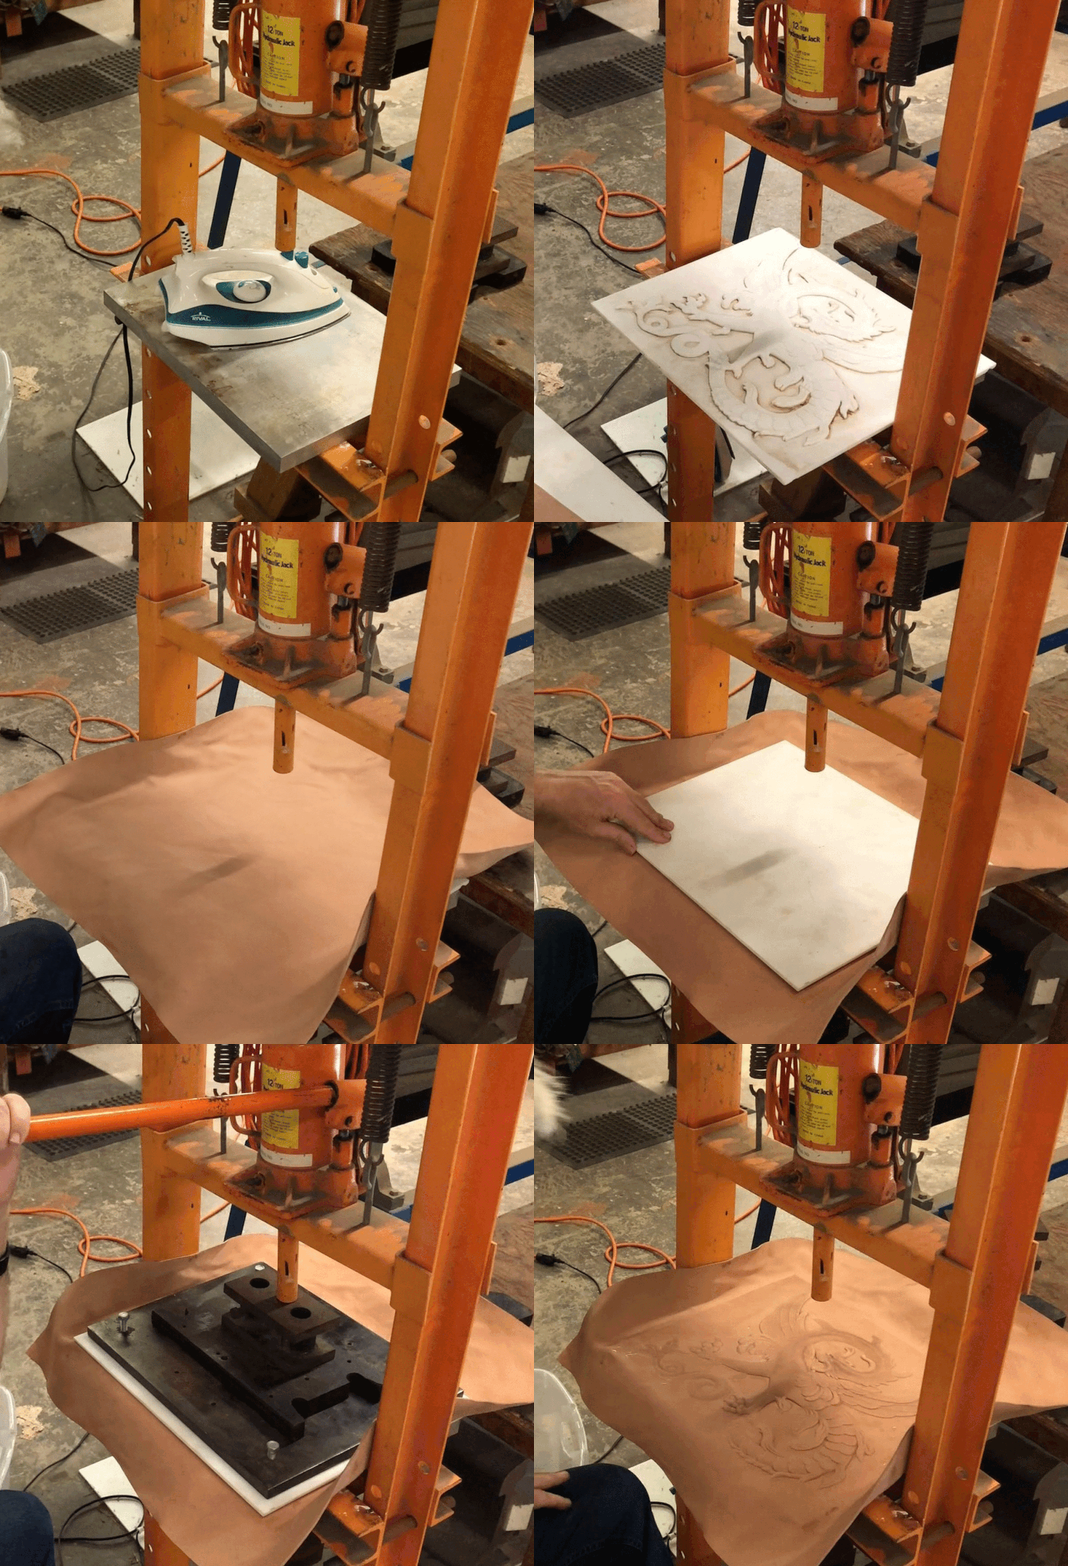
To do the embossing, we researched the best methods the internet had to offer. We discovered the leather should be wetted first, and the embossing die should be heated. We heated an aluminum plate with an ordinary steam iron, then we placed the positive die onto that heated surface. You knew it was hot enough when sprinkled water would sizzle on the plate. Next, the leather would be positioned carefully and the negative die matched on top. Last, steel plates were stacked up and a hydraulic press used to add pressure. After 10 minutes, the stamping was done.


Making the Dragon Seats
Once stamped, we trimmed the piece to match the chair template, again, leaving some extra margin for shrinkage.

Staining the leather took a couple of tests on scrap material to figure out how to get it even and not too dark. Then we applied it to the seats.

The chairs themselves were pretty rotten and needed a lot of restoration work. All of the joints needed new tenons and/or pegs, some of the legs required reinforcing with glue and epoxy, and new feet were turned so all the chairs would be the same height and not rock. Once the woodwork was finished, the chairs were reassembled. The seats were made of eight way hand tied springs that were old and destroyed, so those had to be completely remade by hand.

With the chairs together, the leather could finally be stretched and tacked to the chairs.

The original decorative brass tacks were carefully placed by first drilling a pilot to reduce the risk of damaging them.

Multiple applications of leather conditioner were used to polish and bring out a nice luster before placing them in the library.
The Finish


Thanks for following this story. We hope you enjoyed seeing the process. Be sure to subscribe to be notified first about our next projects!
Explore Project Categories
Customer Stories
News
Subscribe To Our Newsletters
Learning, projects, customer highlights, and promotions in your inbox!


